Expand Your Gesture Vocabulary
 A couple years ago I was motivated to create a box of vocabulary flashcards. I challenged myself to learn a new word daily and to use it throughout that day in a sentence. Somewhere along the way I got distracted, lost interest, and now have lost sight of the cards. Much like my box of words, it’s easy to begin a new behavior but difficult to commit to the changes. I have found that to be true with delivery skills.
As a coach, I encourage intentional vs. accidental use of overall body language; movement across the floor vs. dancing feet, solid eye contact vs. scanning and modulated voice control vs. a monotone. By far, the most difficult intentional skill to learn and change is gesturing. Old habits die hard. Just as a person with a broad vocabulary is more interesting, so is a presenter with varied and intentional gestures.
I’ve had many a client tell me, “I’m Italian, I can’t talk unless I use my hands!” or “Wouldn’t it be better just to gesture naturally in front of the group? Why do I have to change my gestures?” or, “I know I talk with my hands too much, so I just keep them behind my back.”
You don’t have to be Italian to talk with your hands and natural gestures don’t always look natural. Finally, you never want to keep your hands behind your back to avoid gesturing. Your audience will begin to think you’re hiding something.
I want you to use your hands when you speak, but your gestures need to be purposeful. They need to describe your message, or accent a specific word. Well-orchestrated gestures allow your audience to literally “see” what you’re saying. That’s why we talk with our hands. Our gestures help describe and enhance what we’re saying. They paint pictures if executed correctly.
I have three key techniques that you can easily practice to expand your gesture vocabulary.
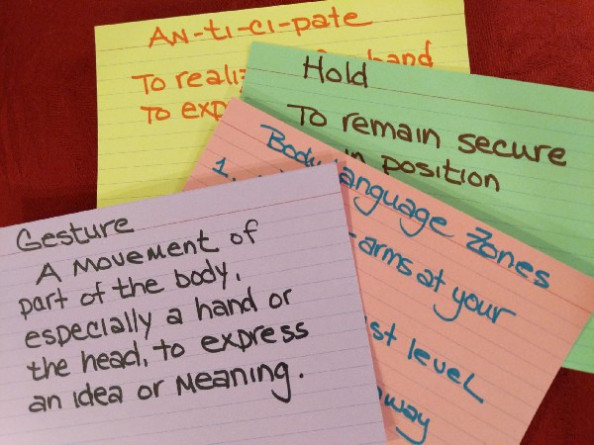
Technique #1 – Know your three gesture zones

Zone 1. Arms at your sides. This is your default zone. My tennis coach used to say, “When all else fails, just watch the ball.” I say, “When all else fails, just drop your arms.” Obviously, you don’t want to be stomp dancing through your presentation so you must use your arms.

Zone 2. Arms above your waist and close to your body. Most of us present our ideas with our hands either in the middle of our bodies, palms facing inward, or extended forward like two parallel boards. That encourages rubber-banding; what the left hand does, the right hand does. Or, we hold hands with ourselves. They start in Zone 2 and end in Zone 2. It’s a very comfortable yet protective posture. Each of these Zone 2 gestures can be incorporated into your message. They just can’t be your ONLY gestures
 Zone 3. Arms above or away from your body. You don’t have to be in front of a congregation to extend or raise your arms. Broad gestures are a sign of enthusiasm and openness. This gesture may feel awkward, but it helps keep your audience engaged and looks perfectly natural.
Technique #2 - Anticipate the gesture
Starting from Zone 1, anticipate the gesture that best illustrates the word or phrase you want to emphasize, then begin the gesture.
Technique #3 - Hold the gesture
Hold the gesture for three beats after the sentence ends, then return both arms to neutral Zone 1.
Sounds so simple. Try practicing with these phrases and see how well you do.
- “It’s not going to happen.” – Both palms facing forward, pushing air down and away to either side of your body. Hold for three beats then return to Zone 1.
- “I’m extremely concerned about this.” – Right hand pounds into the left hand, holds for 3 beats then returns to Zone 1.
- “Are there any questions?” – Raise your right hand as though you are asking a question. Hold that position for three beats, then return to Zone 1.
- “I have bad news and good news to discuss. – Extend your left hand to the side and hold it there as you say, “I have bad news”, and extend your right hand to the other side as you say, “And I have good news”. Put your arms down and take two steps to your left and talk about the bad news. Once you’ve covered that information, take a couple steps to your right to discuss the good news. You have just successfully planned your gestures and body movement to coincide with your message.
A few final tips:
- Stand in front of a mirror and practice introducing yourself using intentional gestures.
- Record yourself before your next meeting or presentation. Turn off the sound and just watch your gestures. Are you using all three zones?
- Observe others gesturing. I promise you’ll decide that less is more.
If you want to learn more about gesturing and creating persuasive presentations, please contact Red Cup Presentations for coaching and training options.
May 23, 2019 by
- share:


1 COMMENT(S)
2019-07-23 18:44:18 by Barbara Miner
Thanks!
POST A COMMENT
E-mail (required but not shown)